Delight in Every Slice: Delicious Blueberry Cake with Mascarpone Frosting

Indulge your sweet tooth in the symphony of flavors that is the Delicious Blueberry Cake with Mascarpone Frosting. This classic dessert is a harmonious blend of sweet and tart, thanks to the fresh, plump blueberries and the deliciously rich mascarpone cream. As the name suggests, it's not just about the taste, its also about the frosting of creamy mascarpone cheese that adds a luxurious touch and sets this cake apart. Whether you're planning a sophisticated afternoon tea or looking for a summertime dessert that impresses at picnics and garden parties, this cake promises a visual feast and a party in your mouth.

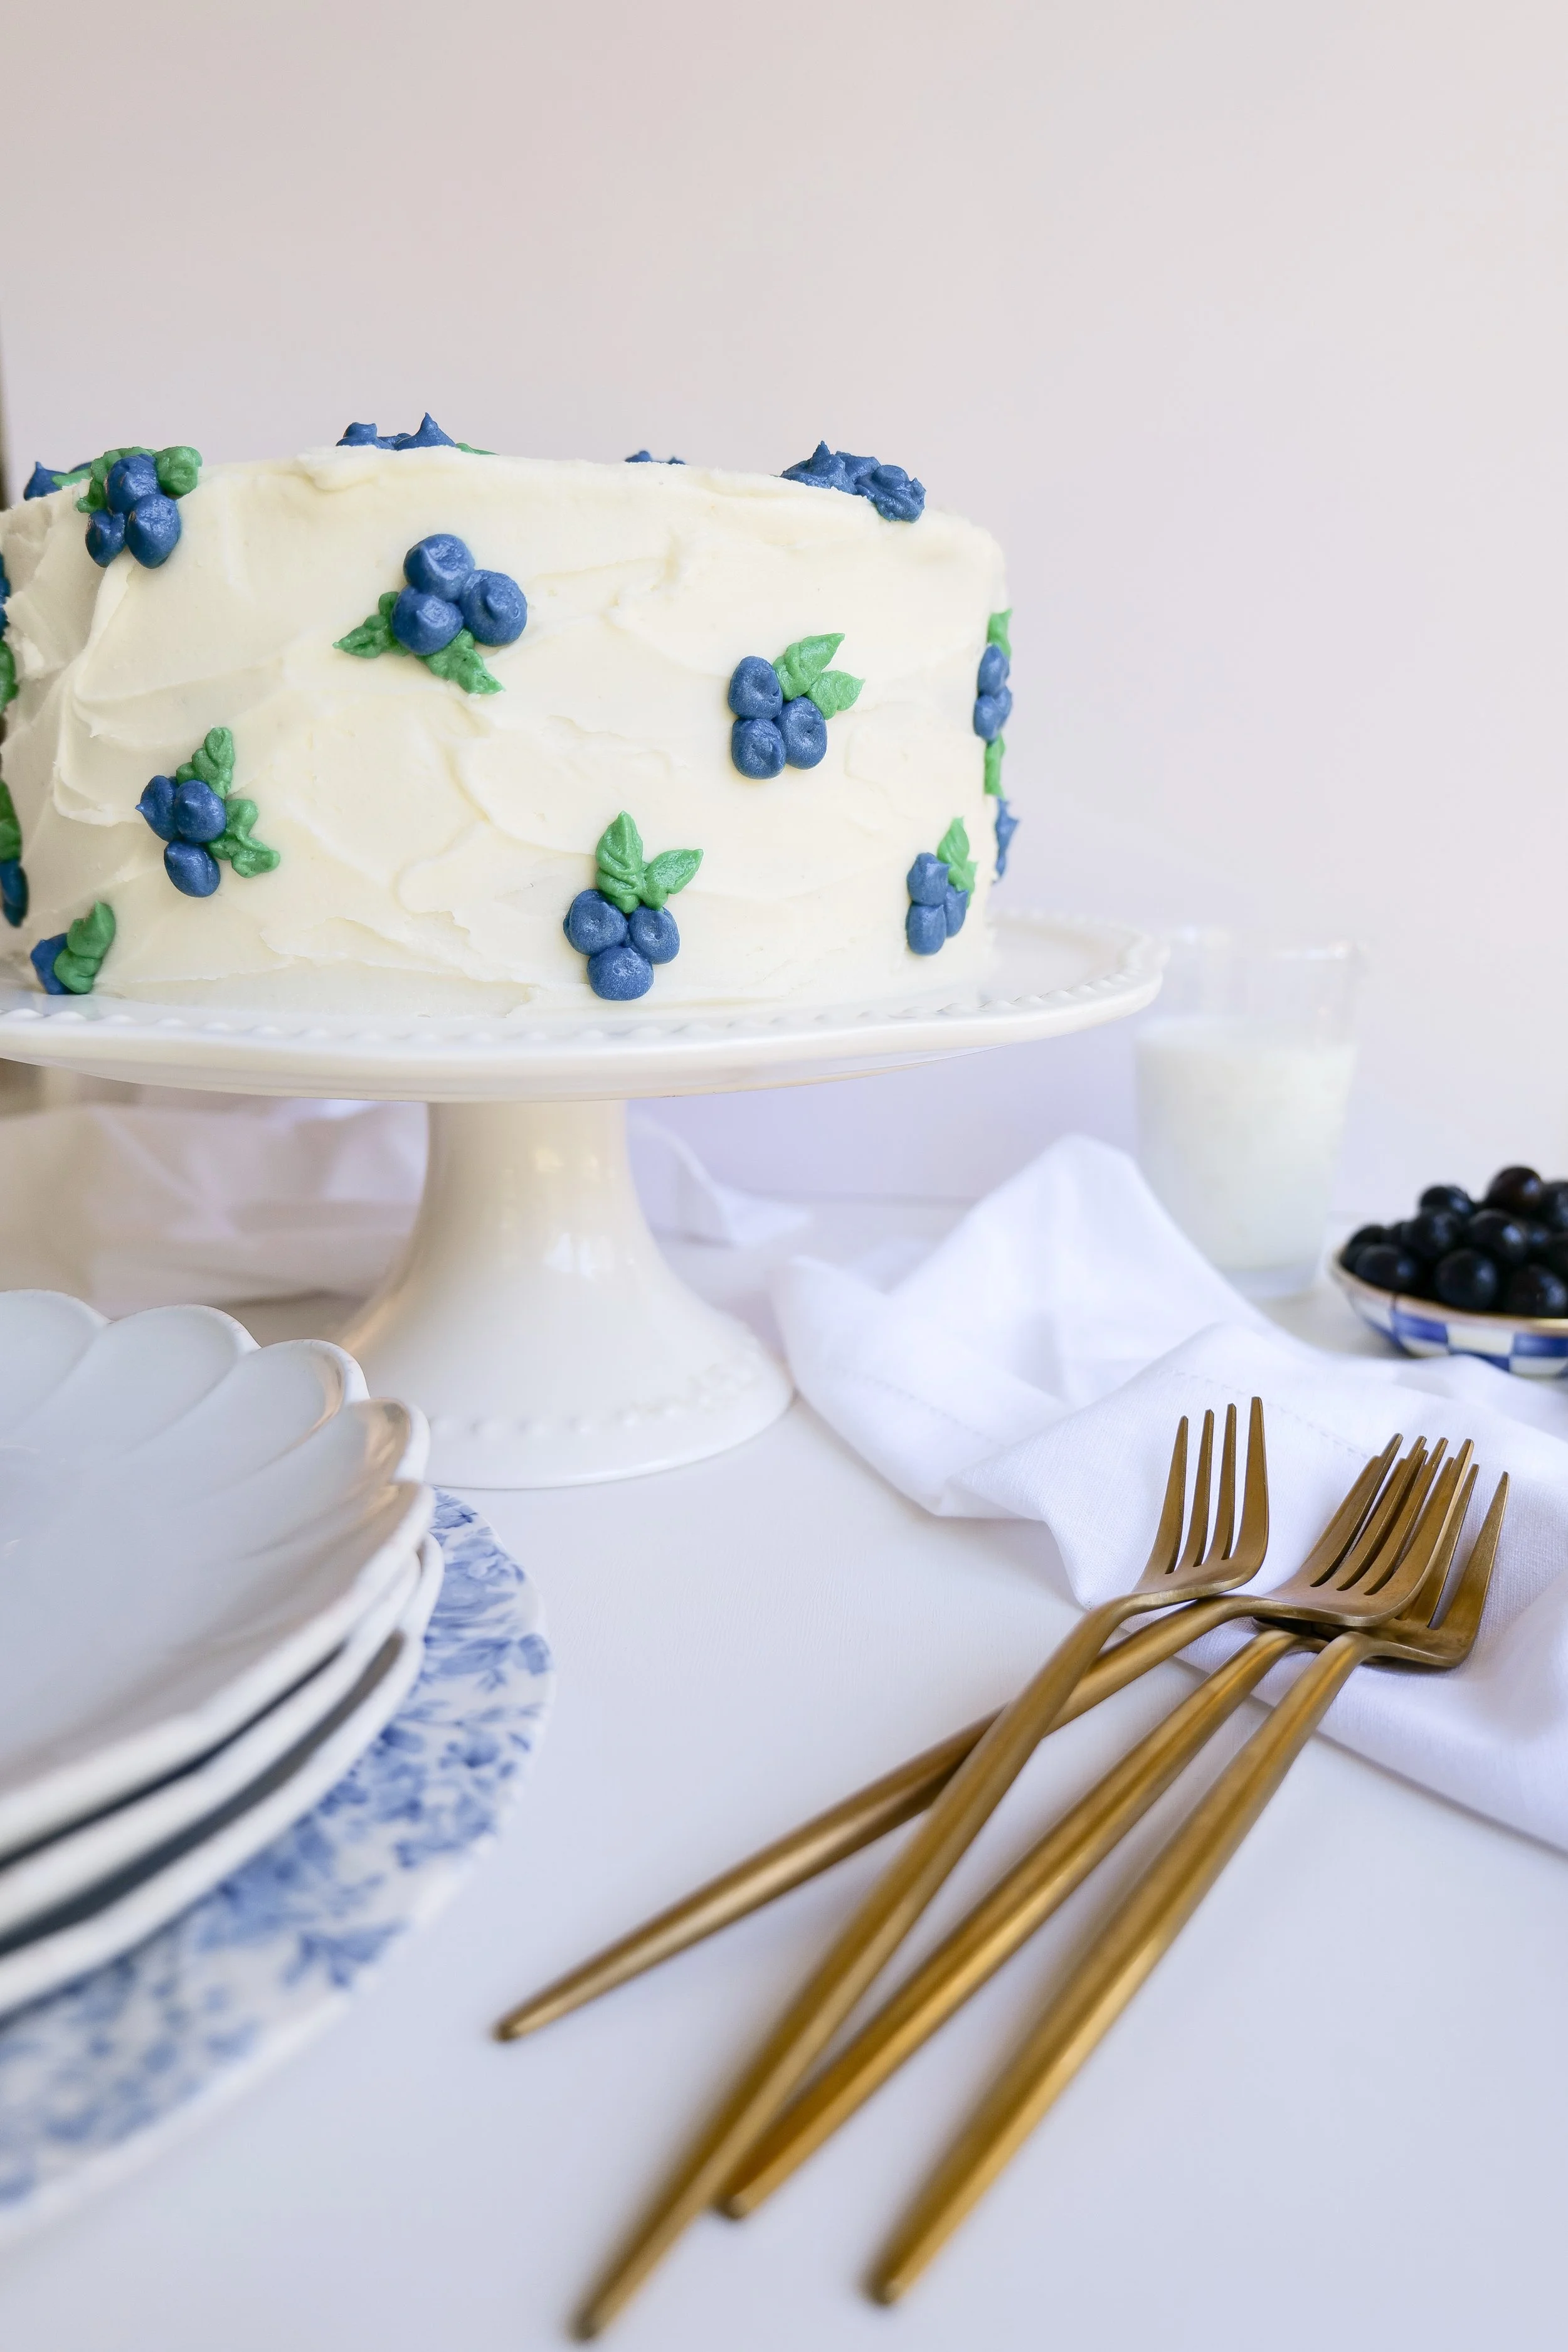
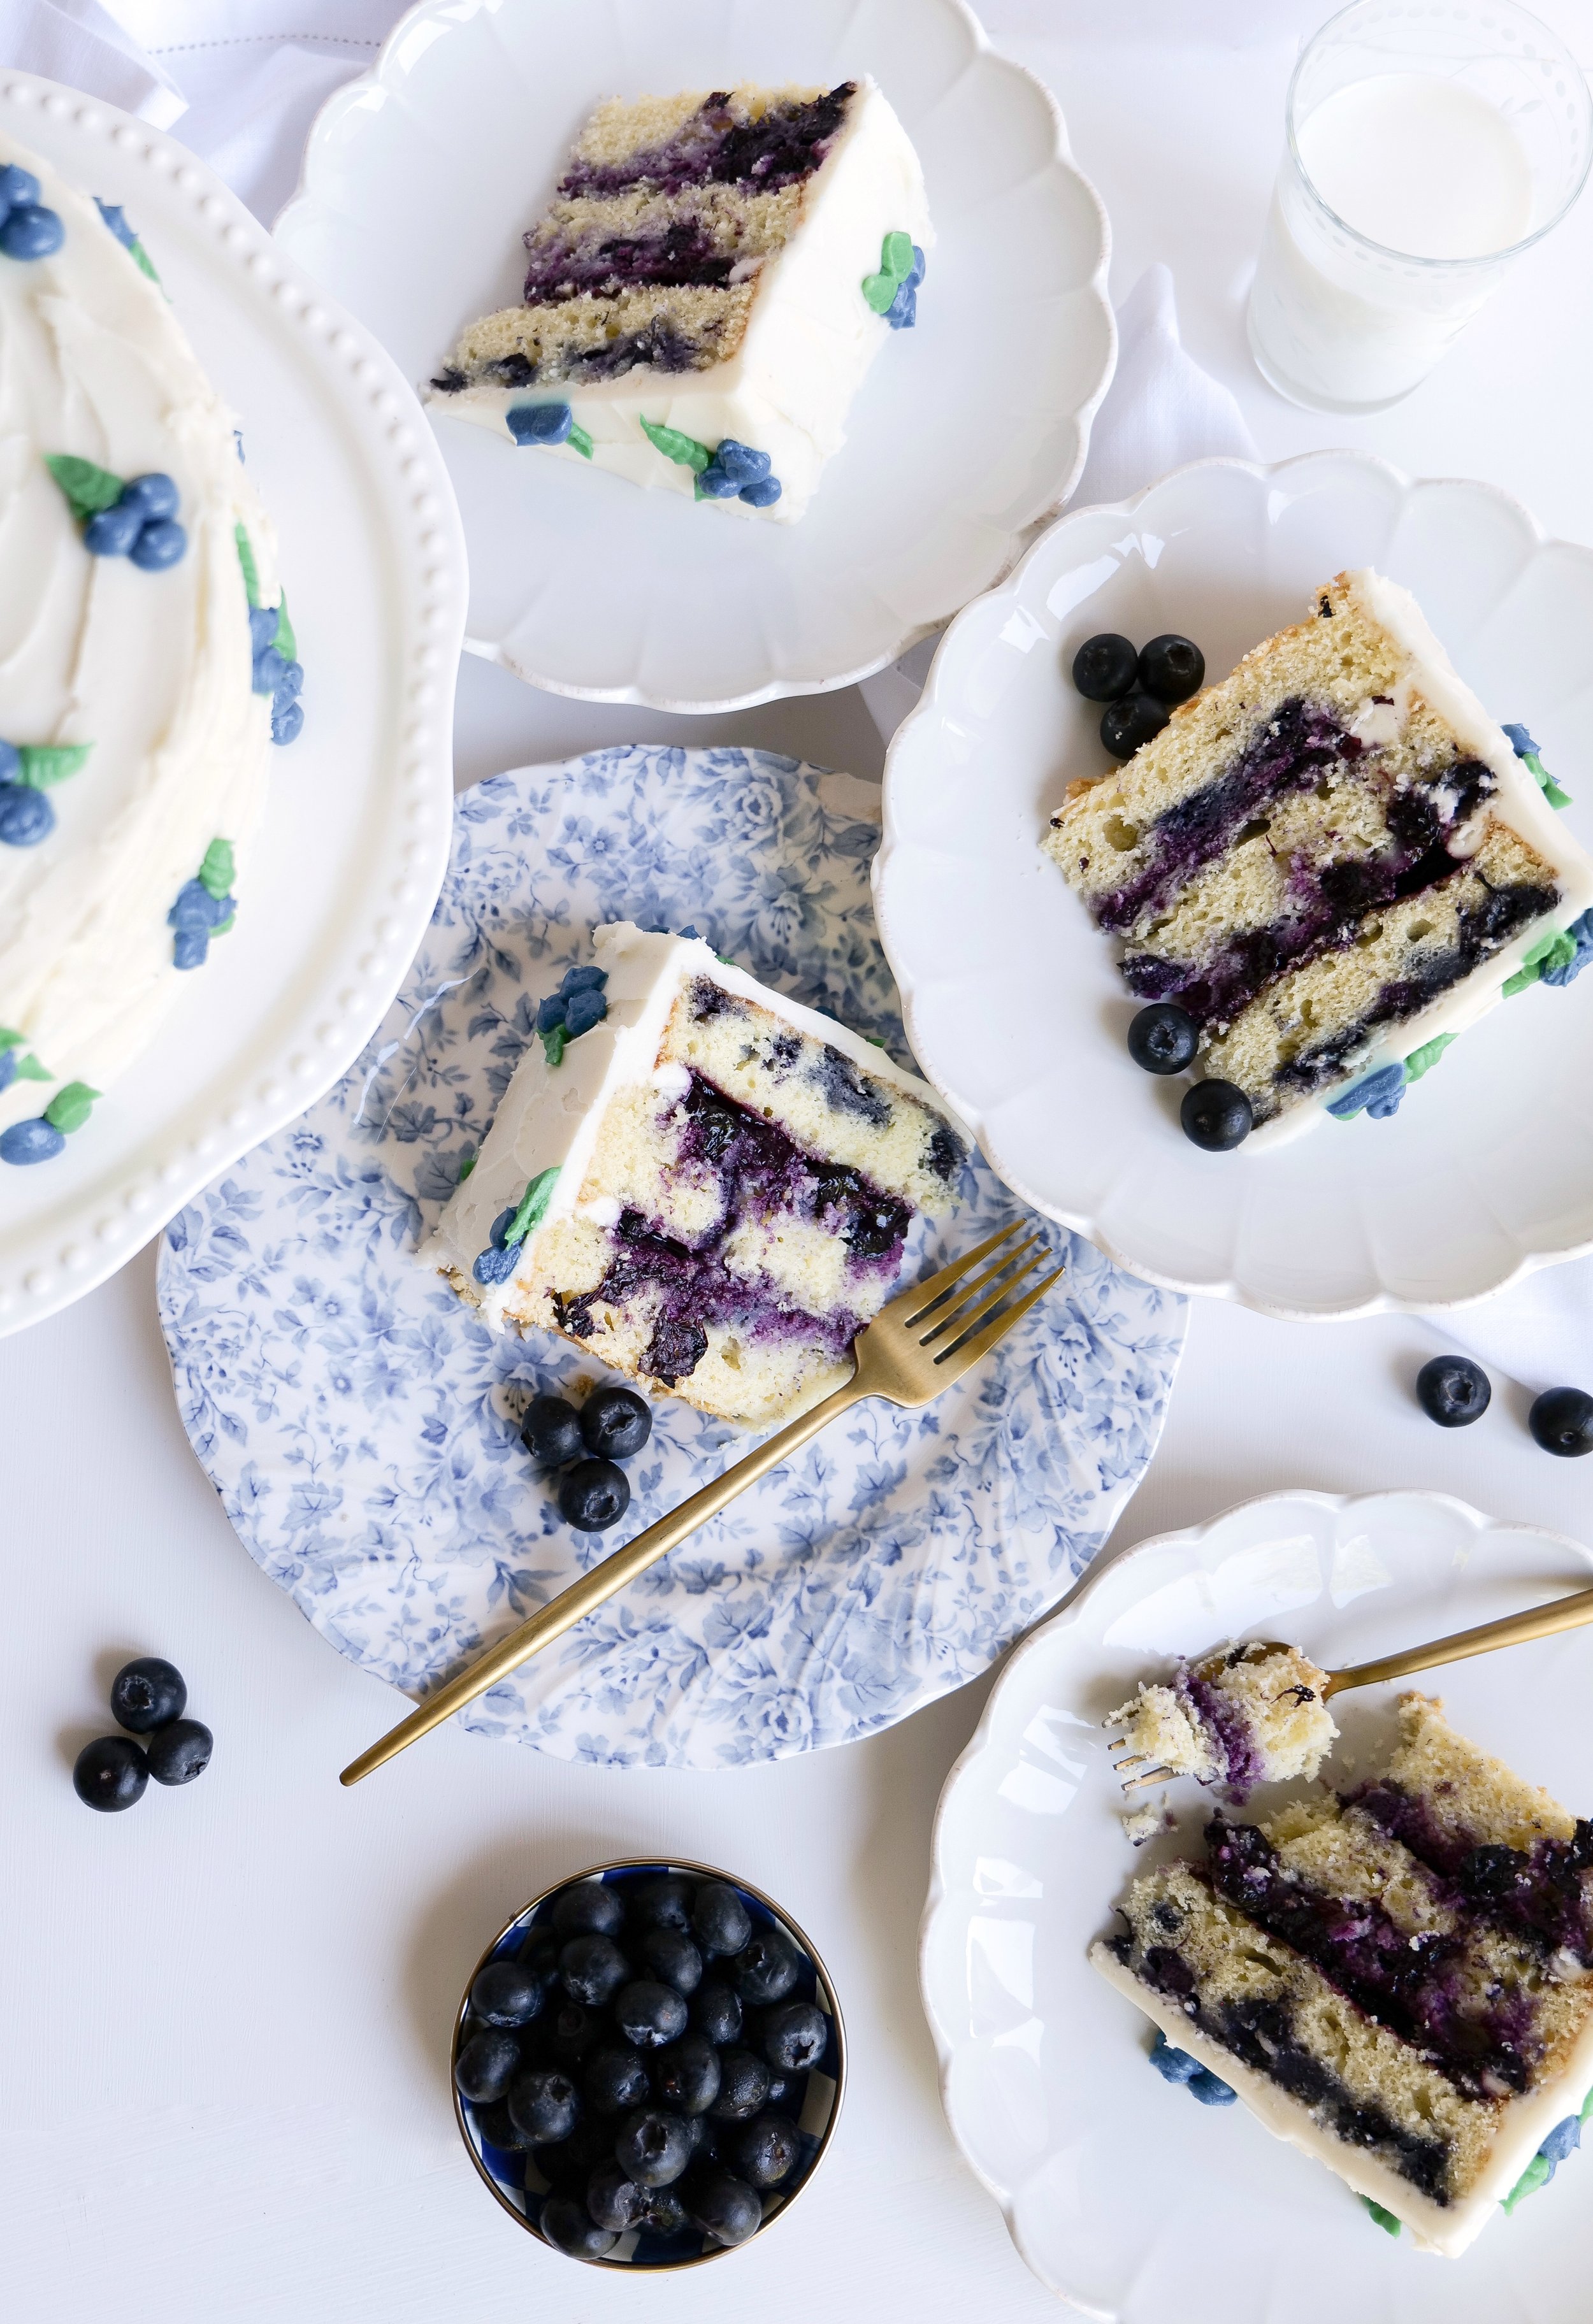
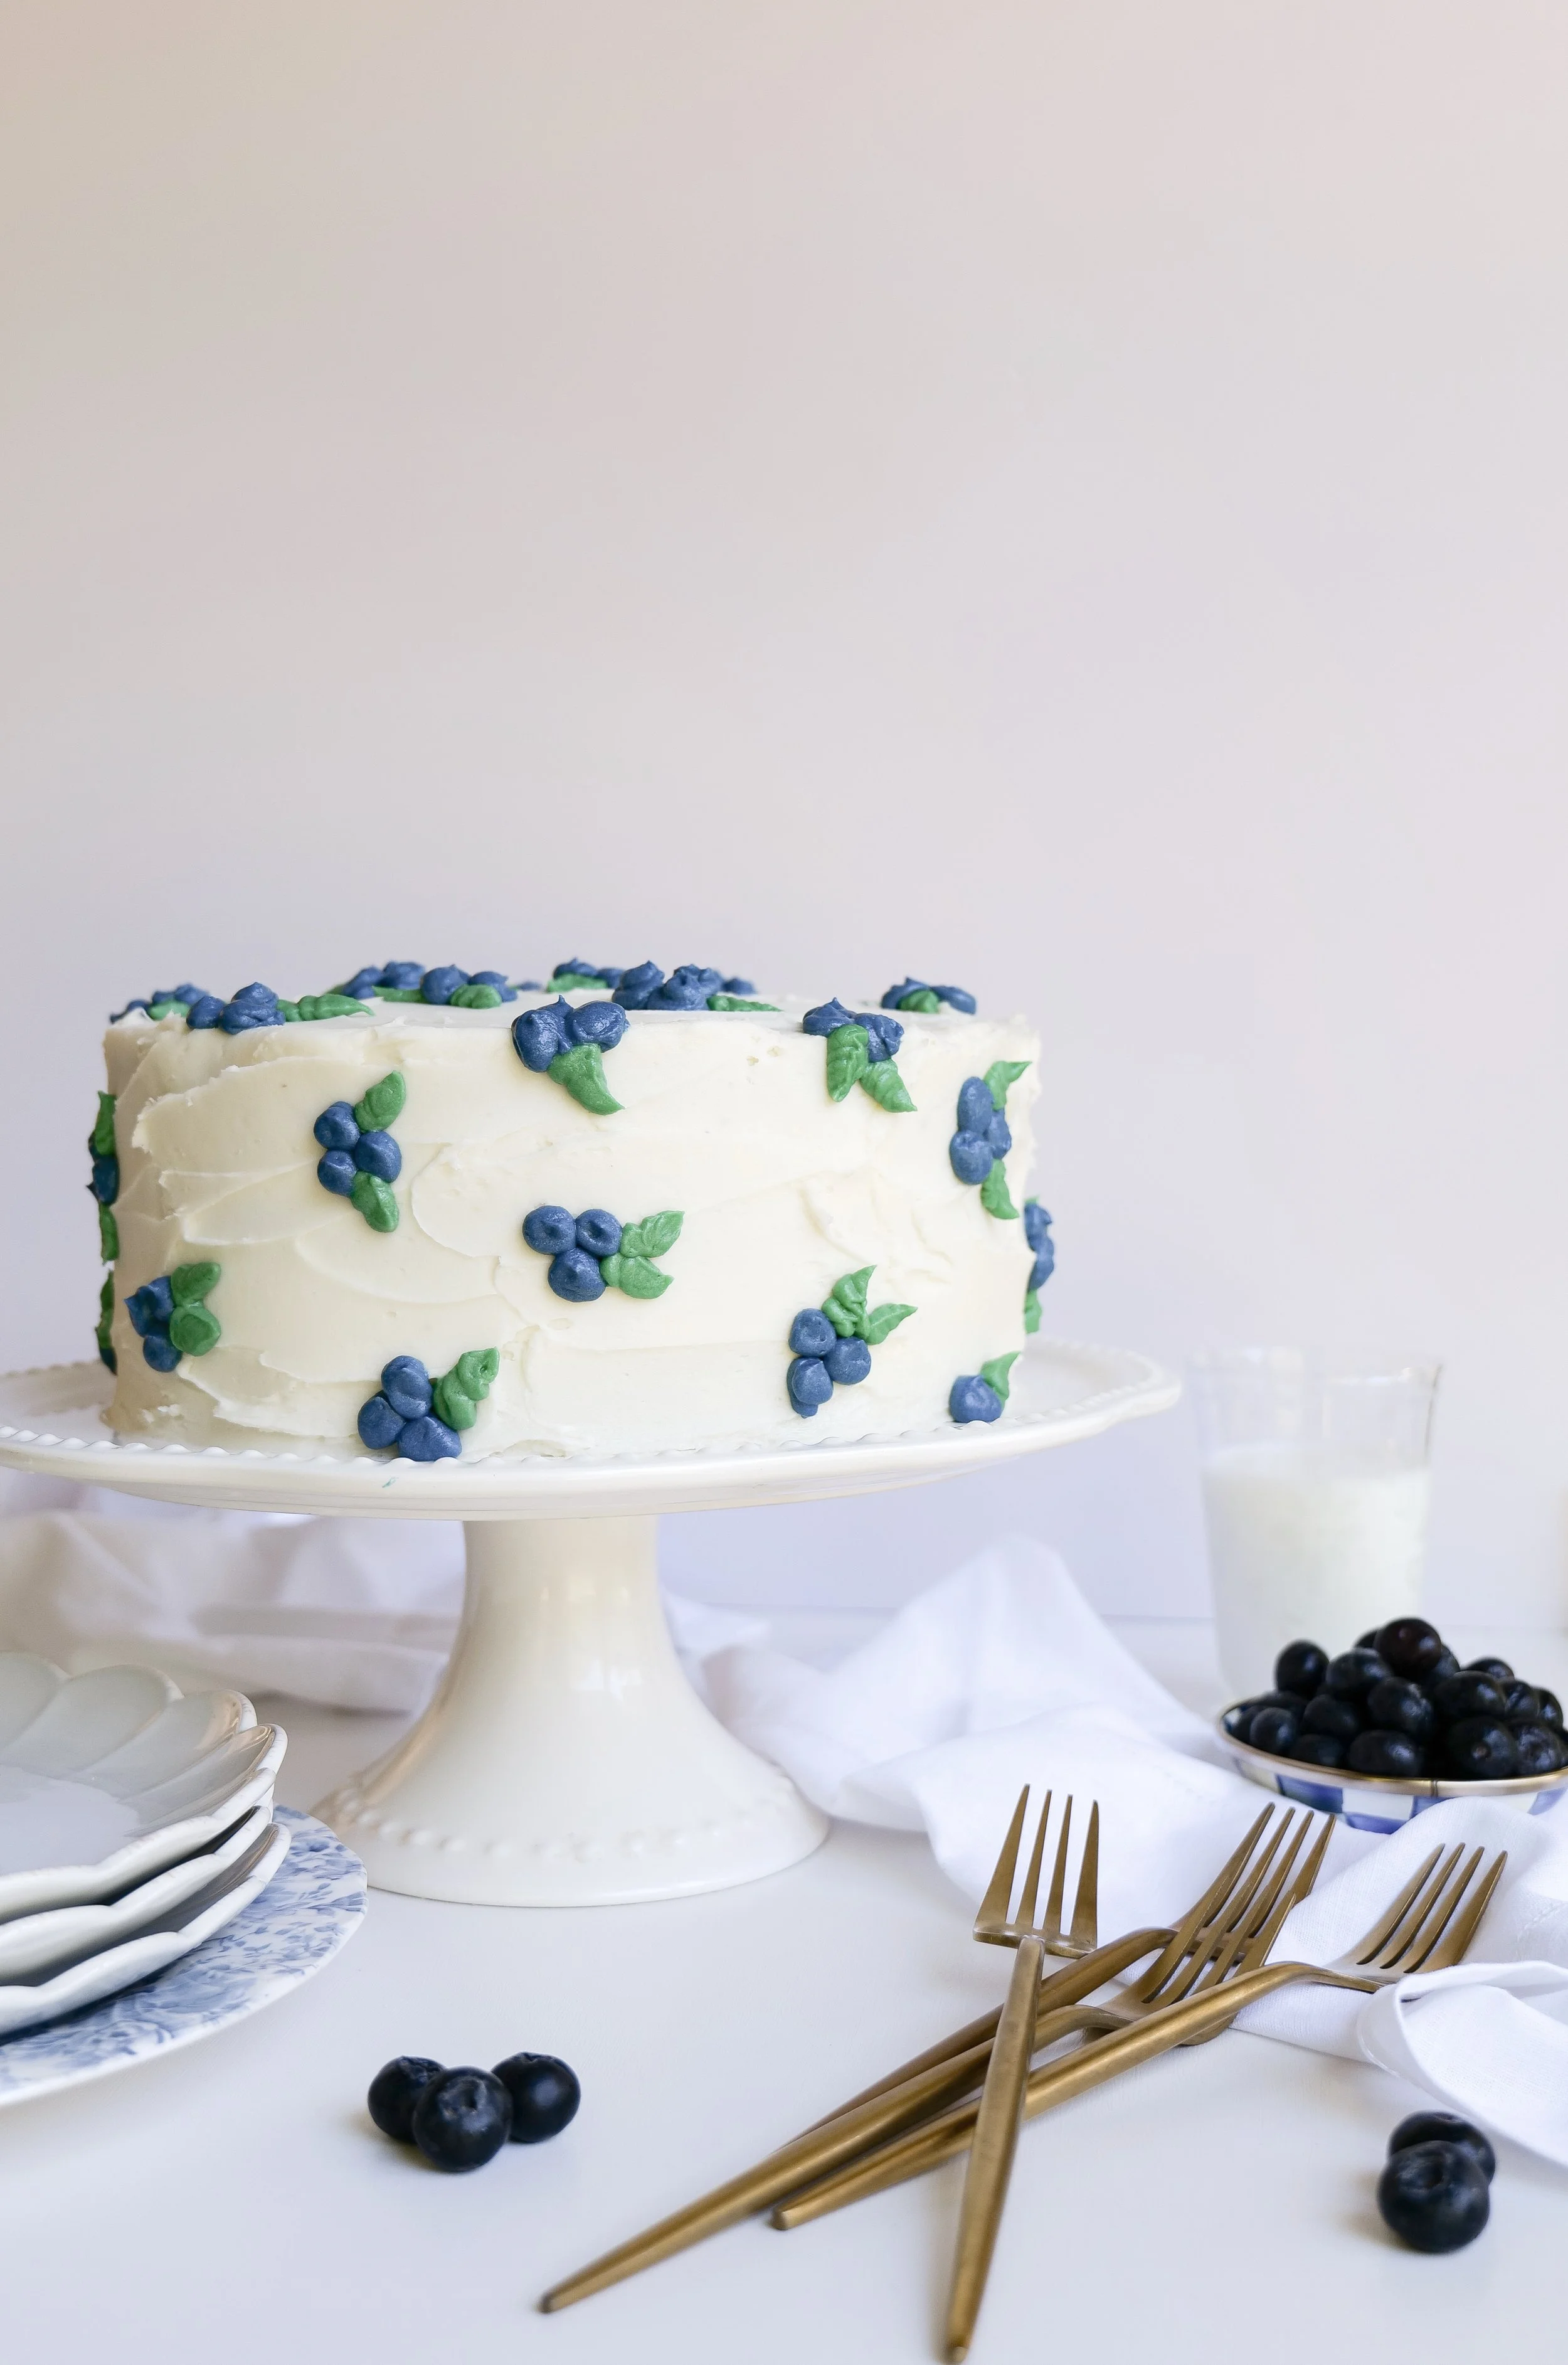
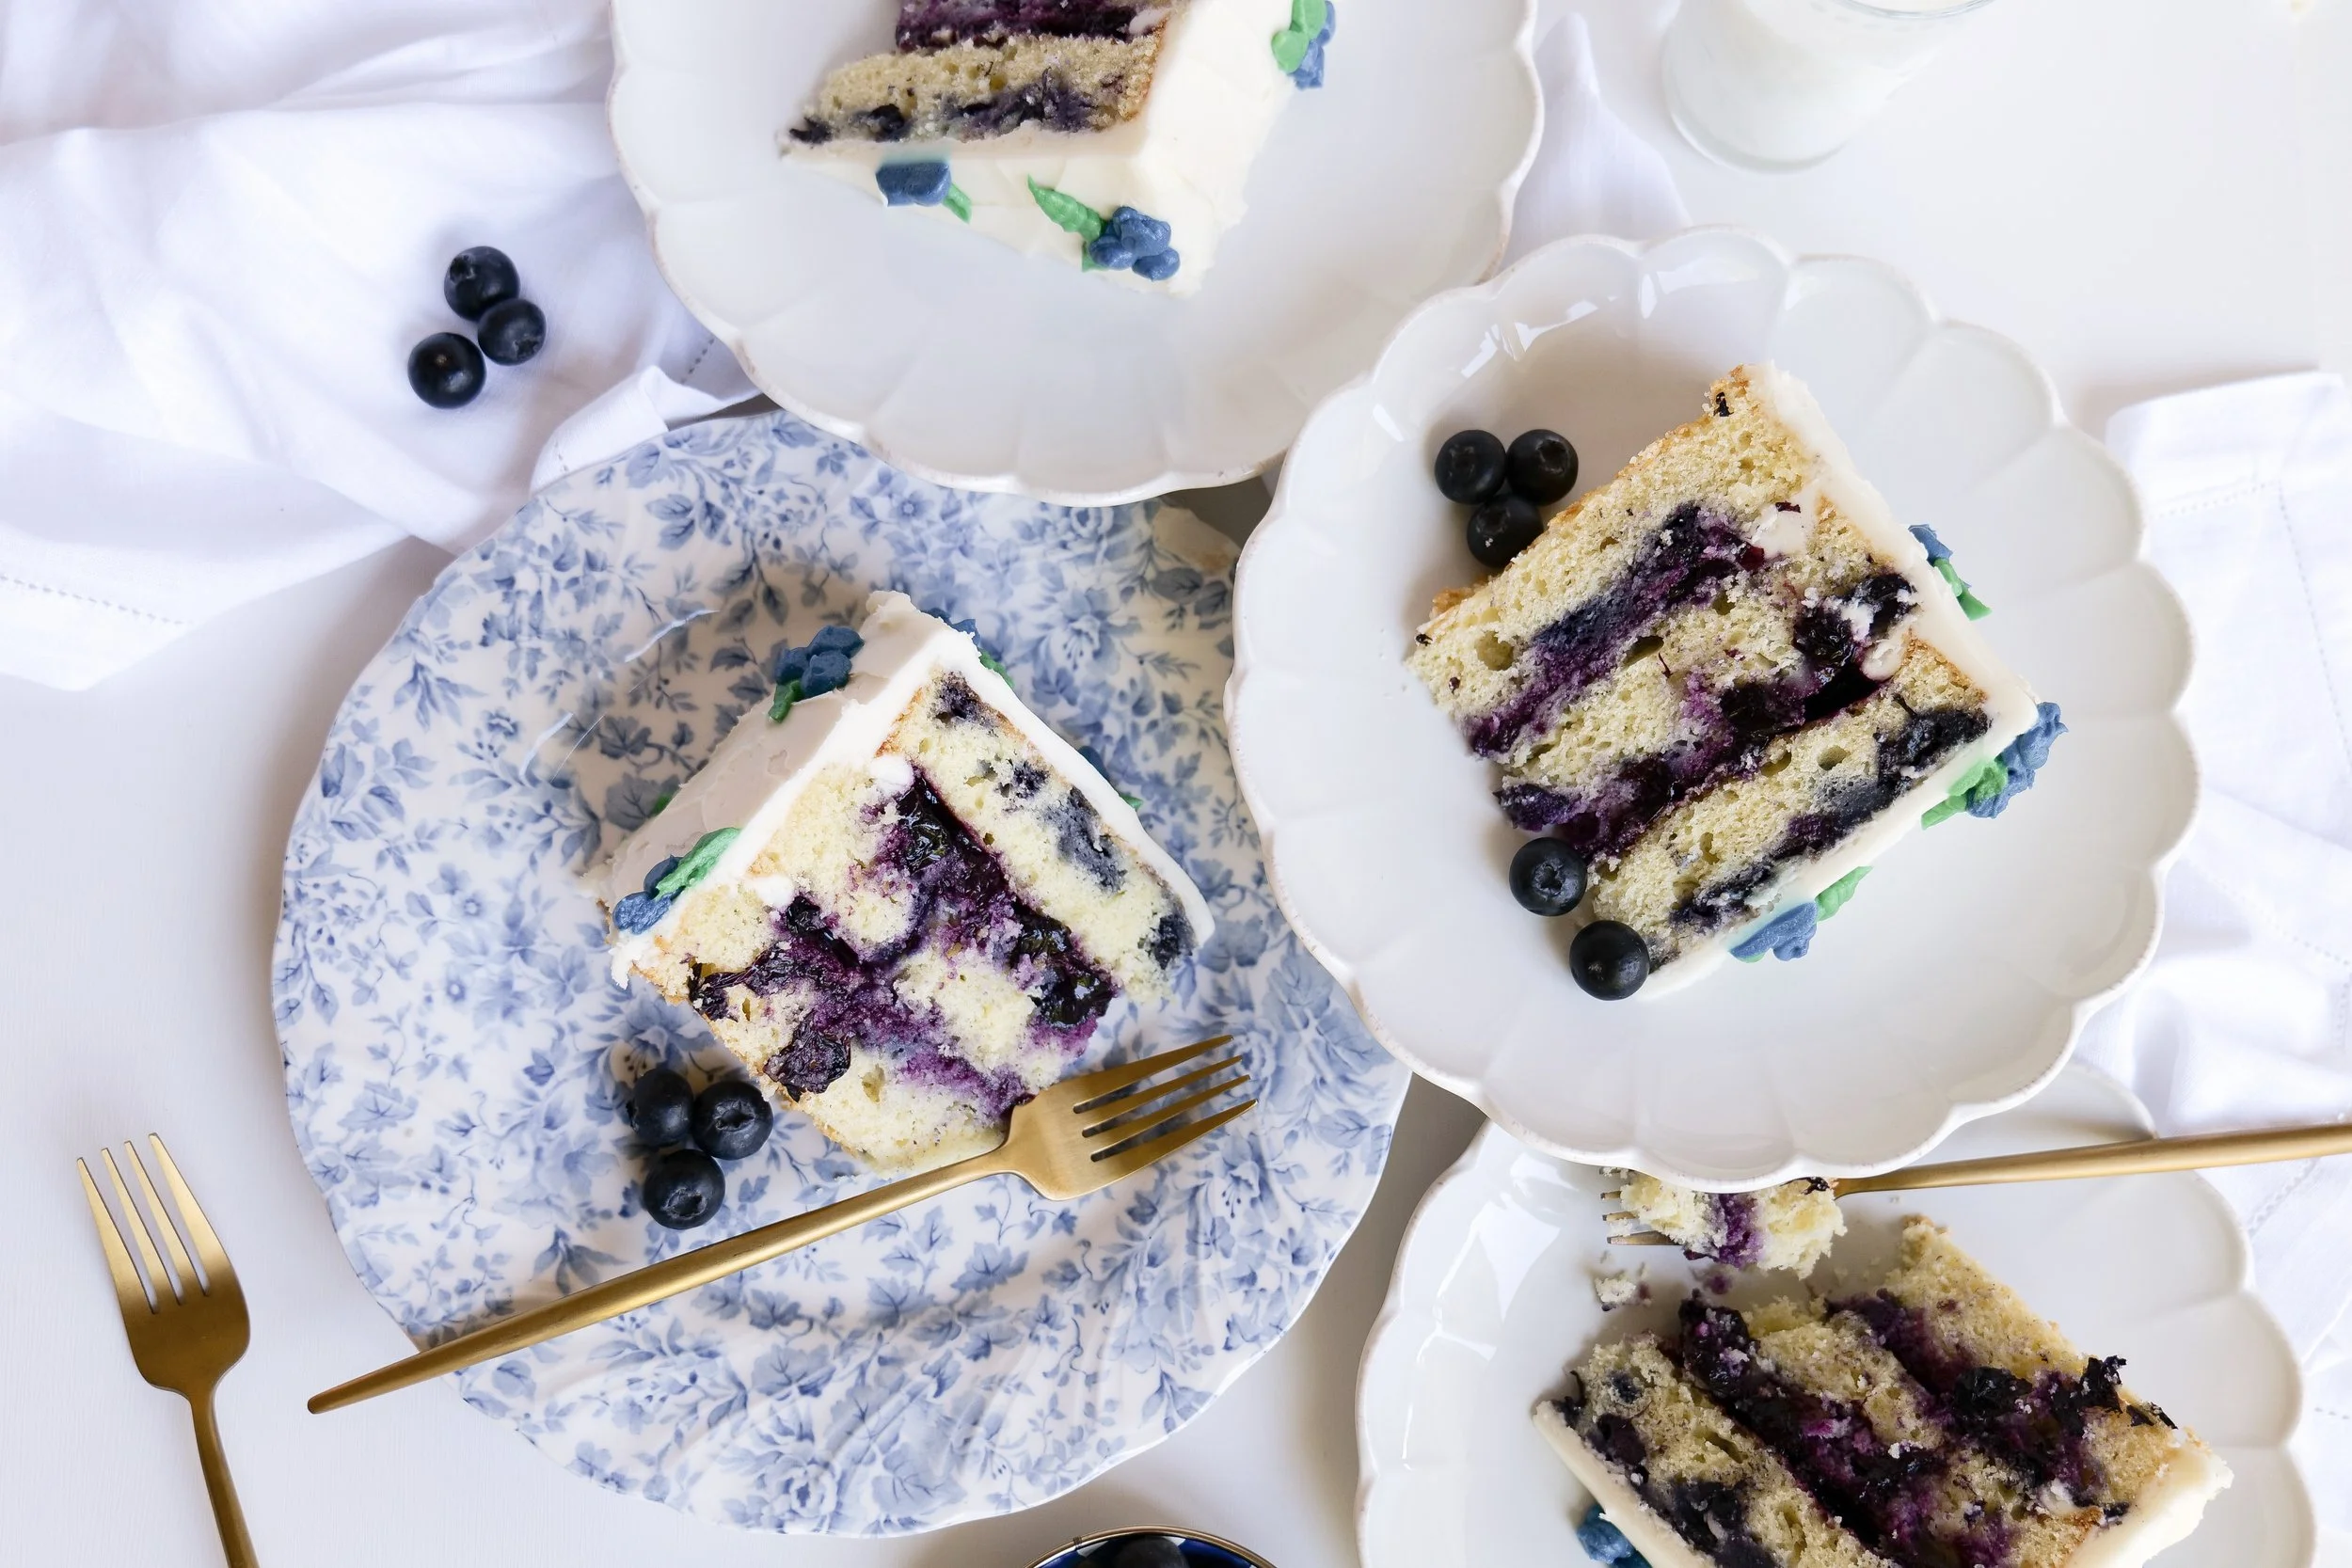
Imagine fresh blueberries folded into a sumptuous batter, providing a juicy burst of flavor that perfectly offsets the sweetness of the cake. However, the real magic happens when this moist, berry-studded sponge meets its match in the form of a creamy, decadent Mascarpone frosting. Far from ordinary, mascarpone frosting steps up as a sophisticated alternative to common buttercream and is a statement maker in both texture and taste. This cake isn't just a treat for the palate; it's a feast for the eyes, especially when adorned with piped blueberries for a fun and adorable element.

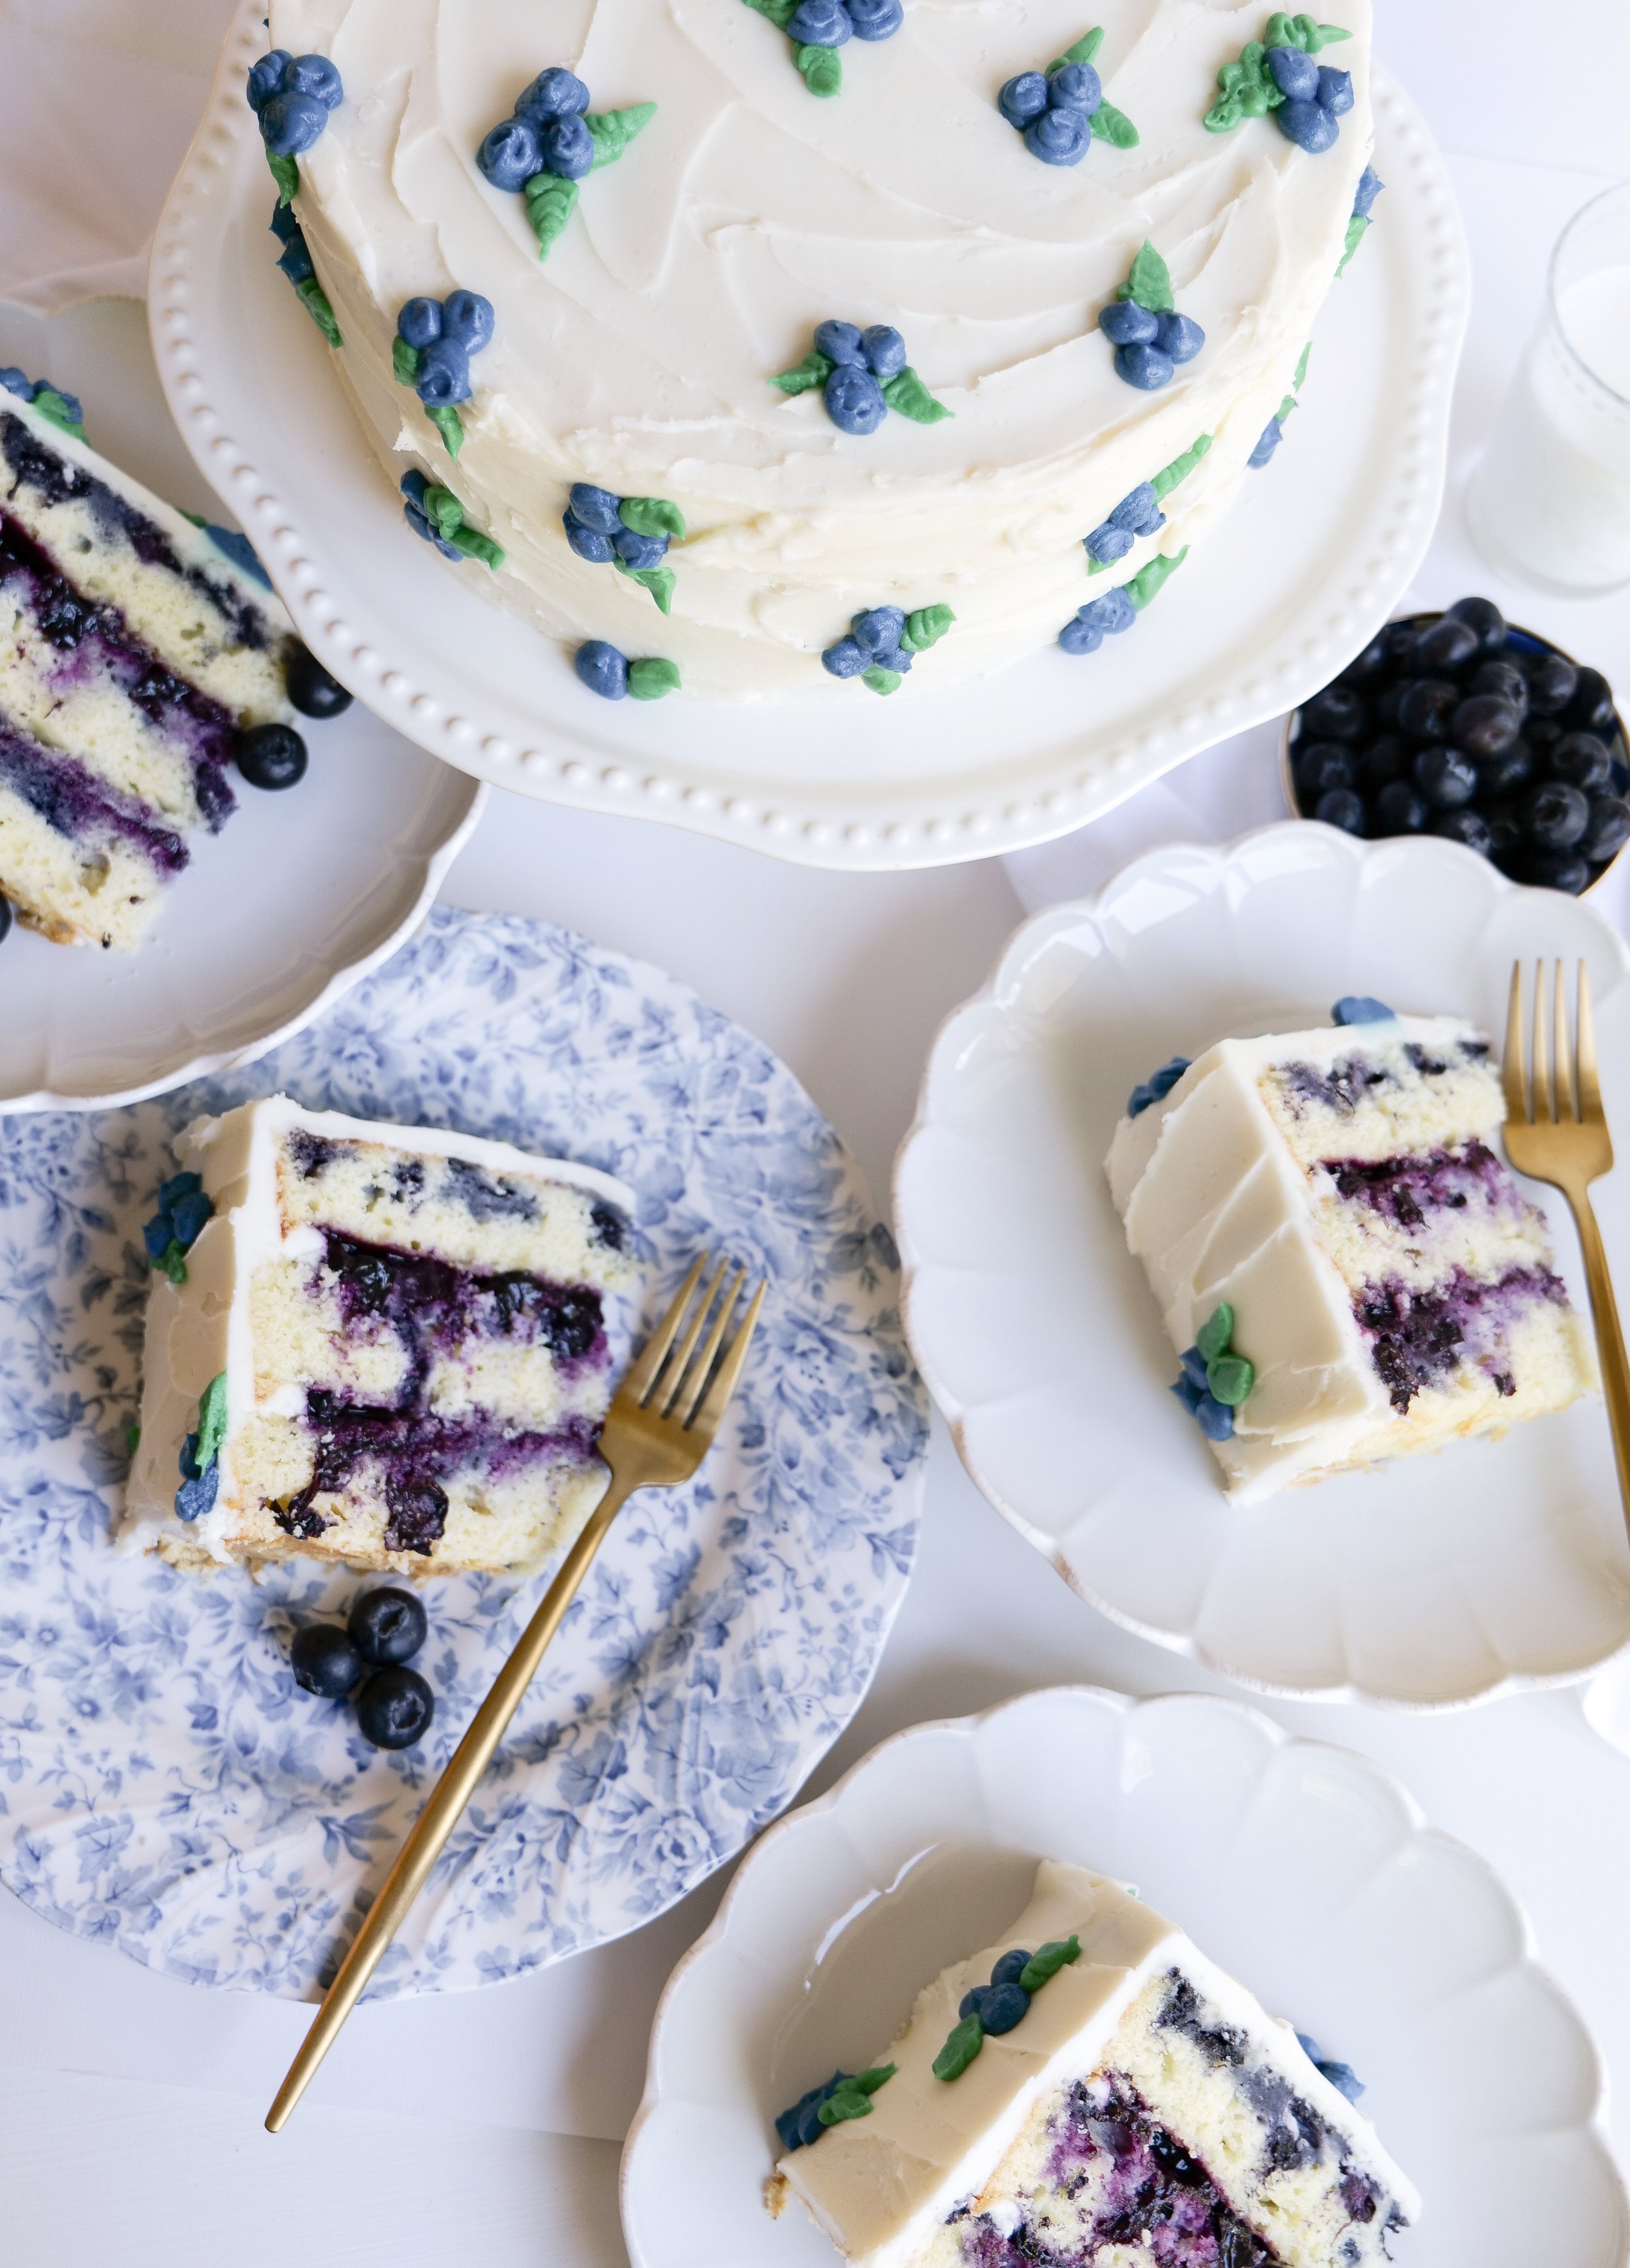
Fresh blueberries are the star of the show, with their bright burst of flavor complementing the sweet cake. Luxurious Mascarpone frosting offers a silkier, more refined texture than traditional buttercream. This makes the cake ideal for a range of occasions, and the cake can be dressed up or down according to the event. Elevate the cake's presentation with garnishes like fresh fruit and citrus zest for an added pop of color and taste.

When one thinks of frosting, Mascarpone often doesn't come to mind, but it should. This creamy Italian cheese, usually reserved for tiramisu, makes for a frosting that's rich but not overpowering, subtle in sweetness, which is exactly what our Delicious Blueberry Cake requires. Transforming the sweet blueberry into an elegant dessert, the Mascarpone frosting coats each layer with velvety luxury, while the hint of lemon zest cuts through the richness, balancing each bite. Unlike its denser counterpart, buttercream, Mascarpone creates a frosting that's light and spreadable, perfectly accentuating the cake, both in flavor and aesthetic. This isn't just frosting, it's an upgrade that adds finesse and elevates the cake to a premium dessert tier that will stand out at any gathering. Mascarpone elevates the cake, adding creaminess and subtle sweetness. The frosting's lightness complements the tart blueberries in a symphony of flavor. It spreads smoothly for a flawless finish.

Not just reserved for frosting, Mascarpone incorporates beautifully into the baking process, contributing to the Delicious Blueberry Cake's moist crumb and rich, nuanced flavor profile. Its creamy texture and slight sweetness melds with the brightness of blueberries to create an unforgettable celebratory dish that's as fitting for a casual Sunday brunch as it is for an elegant evening soiree. To ensure success when integrating Mascarpone in baking, bring the cheese to room temperature. This is crucial for smooth frosting and even mixing into batter. It is a simple step, but one that makes all the difference.

Berry Swap: Fresh vs. Frozen Blueberries in Your Cake

Seasonality need not limit the enjoyment of a Delicious Blueberry Cake with Mascarpone Frosting. Frozen blueberries stand as a viable substitute for fresh ones, ensuring this cake's year-round appeal. Opt for frozen blueberries when fresh aren't available but remember to thaw and drain them first. Lightly coat them in flour to avoid them sinking through the batter during the bake. The vibrant taste remains unaffected, though the varying moisture levels may slightly alter the cake's hue. Frozen blueberries afford convenience and consistency, ensuring this cake's status as a perennial favorite regardless of the season.

Lasting Sweetness: Storing Your Blueberry Mascarpone Masterpiece

Leftovers, if they happen, require care to preserve the cake's fresh, tantalizing qualities. Refrigerate in a sealed container, where the cake will remain fresh for 3-5 days. A plastic wrap against cut surfaces staves off dryness. Store the cake away from foods with strong odors to avoid taste transfer. For extended storage, wrap cake slices and freeze, then defrost before serving for an almost-as-good-as-fresh experience. Maintaining leftovers properly means this cake can continue to delight for days, each slice a testament to the time and love invested in its creation.

As the final crumbs settle, the Delicious Blueberry Cake with Mascarpone Frosting exits not just as a recipe but as an experience that is a delight to both the eye and the palate. The dance of the velvet caress of Mascarpone and the pop of blueberries combines into a confection that's far more than the sum of its parts. For those days that call for something special or moments when only a slice of perfection will do, this cake stands ready to answer the call.

Ingredients:

3 large eggs

3 large egg whites

1 cup heavy whipping cream

2 tablespoons melted butter

3 teaspoon vanilla

1 - 1/2 cup sugar

2-1/4 cups cake flour

1 tablespoon baking powder

3/4 tsp salt

1 cup grated butter

2 cups jumbo blueberries, from Family Tree Farms

1 tablespoon of flour

Filling:

4 cups blueberries, from Family Tree Farms

1 cup granulated white sugar

juice of 2 lemons

Frosting:

1 cup salted butter

2 teaspoon vanilla extract

5 cups powdered sugar

8 oz mascarpone

Instructions:

1. Prep by oiling 3 circle pans (8 or 9 inch) and preheat oven to 350 degrees.

2. Blend together eggs, heavy cream, melted butter, and vanilla completely.

3. Gently fold dry ingredients in a different bowl until combined.

4. Grate 1 cup of butter on top of dry ingredients. Combined by hand until butter is no larger then pea sizes.

5. Next up add in wet ingredients and blend together with hand mixer on medium-high.

6. Once combined put into 3 pans that are oiled and put into oven. 22-27 min or until a toothpick inserted comes out clean. While cake is cooking in the oven take a pot on the stove and add in filling ingredients; blueberries, sugar & lemon juice. Cook, stirring often until blueberries burst and make a beautiful jam.

7. Blend together all frosting ingredients until well combined. (butter and mascarpone should be room temp if not heat in microwave for 30 sec at a time) You can add more heavy cream or powdered sugar depending on desired consistency. I sometimes also double the recipe to a thick layer on the outside.

8. Once cake is done baking let cool in pan for 15 min and transfer to cooling rack to cool completely.

9. Ice layers of cake and do a thin later around for a “crumb layer” that will catch all the crumbs and make a base for the final layer. Place in fridge for 30 min and then do another final layer. Smooth, textured, piped blueberries or fresh, whatever you desire!

10. Enjoy!

An Irresistible Treat: The Delicious Berry Custard Puff Pastry Tart

Treat your guests to a delicious classic dessert with a twist with this homemade Berry Custard Puff Pastry Tart. This dessert is an irresistible combination of custard, puff pastry, and fruit that looks and tastes like a gourmet dessert. The tart is filled with creamy custard and topped with fresh berries for a flavor combination that is sure to impress. The puff pastry custard Danish adds a flaky, crunchy texture to contrast the creamy custard and juicy berries. It's a sweet and tart balance that will please any crowd. The colors of the berries make this yummy dish visually appealing too, making it an impressive spread!

Making this tart is simple and easy. All you need is some puff pastry, custard, and fresh berries. You can serve it with a dollop of whip cream or powdered sugar sprinkled on top with almond slices. Not only is this pastry visually stunning, but it also has a delightful combination of sweet and savory flavors that will make your taste buds dance. In this blog post, I will provide step-by-step instructions on how to make this irresistible tart.

The custard pastry recipe can be made with either cream or milk, depending on your preference, and the berries of your choice added to the top. The tart can be served warm or chilled, depending on your preference. It can be stored in the refrigerator for up to four days, making it a great make-ahead dessert, or for breakfast quick grabs for the week. Berry Custard Puff Pastry Tart is perfect for any occasion and a great way to start a day or end the day as a dessert after your final meal. The combination of the light and flaky puff pastry and the sweet berries will have your guests asking for seconds. Whether you’re hosting a dinner party, throwing a birthday celebration, or just need a special treat for yourself, this simple homemade tart is sure to be a hit.

Ingredients

1 puff pastry sheet

1/2 cup raspberries

1/2 cup blueberries

Sliced Almonds

Powdered Sugar

2 cups milk

1/2 cup granulated sugar

1/3 cup cornstarch

4 large egg yolks

1 teaspoon almond extract

Instructions

1. Warm milk on stove until hot but not boiling. In a medium bowl whisk egg yolk, granulated sugar and cornstarch until light and fluffy. Add milk slowly being sure no lumps form. Pour back into pan used to heat milk and heat until a continuous boil begins and cream thickens. Make sure it does not stick to the bottom. Reduce heat and continue to cook until it reaches desired thickness. Pour into bowl and cover with plastic wrap placing in fridge to cool completely.

2. Preheat oven to 400 degrees. Let puff pastry warm at room temp until you are able to unroll without cracking. unroll on cookie sheet and cut into 6 individual puff pastries and fold edges over to make crust. Take fork and prick the middle of each pastry that is not folded. This is to help from "puffing" in the middle while baking. Brush side of the crust with egg yolk, milk or water and sprinkle with sugar if you desire.

3. Bake 10-12 minutes until pastry sheet is golden brown. Remove from oven.

4. Take custard from fridge and add to a piping bag or baggie you can cut tip from.Pipe Custard onto each pastry or use a spatula to evenly spread.

5. Add raspberries & blueberries ontop and sprinkle with slices almonds & powdered sugar if desired. Enjoy!

Is It Possible to Substitute the Puff Pastry for a Different Type of Dough?

If you're looking for a delicious and easy-to-make dessert, look no further than a Berry Custard Puff Pastry Tart. This classic tart is a delicious combination of a buttery puff pastry shell filled with a creamy custard and topped with fresh berries. While the puff pastry is the traditional dough used for this tart, there are a variety of other doughs that can be used as a substitute.

Shortcrust pastry is a great option to use as a substitute for puff pastry. It is a flaky, crumbly pastry dough that helps create a crisp tart shell. For a gluten-free option, almond flour dough is an excellent substitution for puff pastry. If you’re looking to add a bit of extra sweetness to your tart, chocolate dough is also a great option. Filo pastry can also be used to make a delicious Berry Custard Puff Pastry Tart. Filo pastry is a light and flaky dough that is perfect for creating a crunchy tart shell.

No matter which dough you choose, you’ll be sure to enjoy this delicious Berry Custard Puff Pastry Tart. With a variety of doughs to choose from, you can easily find the perfect option for your taste. So, what are you waiting for? Get baking and enjoy a delicious Berry Custard Puff Pastry Tart today!

Other Pastries & Desserts You Will Love:

The Perfect Peach Cobbler Recipe

Deliciously Sweet and Tangy: Blueberry Orange Glazed Muffins

Soft Cream Cheese Lemon Blueberry Scones

A Sweet and Delicious Recipe for Lemon Poppyseed Bread

Indulge in Delicious Personal Pear Tarts

The Perfect Peach Cobbler Recipe

Who doesn't love a good peach cobbler? It really is the quintessential Summer dessert. A good peach cobbler is so perfectly sweet and deliciously crunchy and is sure to be a hit with your family and friends. Whether you’re using fresh or canned peaches, this recipe is sure to be a winner. Follow this simple step-by-step guide to make a delicious and easy peach cobbler that will have everyone begging for seconds.

Peach cobbler is a classic Southern dessert that is fairly easy to make and sure to please. This comforting dessert is a real fan favorite and is perfect for any occasion. The combination of fresh sweet peaches, a buttery biscuit-like topping, and a hint of cinnamon makes this cobbler truly irresistible.

To make this delicious cobbler, you will need fresh peaches, butter, sugar, and a biscuit-like topping. The peaches are the star of the show here, so be sure to use the freshest peaches you can find. Combine the peaches, butter, and sugar in a baking dish and spread the biscuit-like topping over the top. Bake in a preheated oven until the topping is golden and the peaches are bubbly and tender.

Once the cobbler is ready, it's best served warm with a scoop of vanilla ice cream. Enjoy the combination of sweet and buttery flavors and the hint of cinnamon. This cobbler is one of my most used recipes for guests. Every time I make it the crowd is so happy and it finishes off the meal perfectly. So, why not make this classic Southern dessert today?

Ingredients

10 Servings

6 cups fresh peaches

1 & 1/2 cups granulated sugar

1/4 teaspoon cinnamon

1/8 teaspoon nutmeg

2 teaspoons flour

Topping:

2 & 1/2 cups all-purpose flour

1 cup white sugar

1/2 cup dark brown sugar

2 teaspoons baking powder

1 teaspoon salt

1 cup heavy cream (can substitute for buttermilk)

1 egg

8 tbsp butter

Sugar Topping:

2 tablespoons granulated sugar

1/2 tablespoon cinnamon

Instructions

  1. Preheat oven to 375 degrees

  2. Remove skin from peaches by blanching. To do this you start by placing peaches in boiling water for 30-45 seconds. Immediately take out and place into a bowl of ice water. The peaches will peel perfectly.

  3. Once peaches are peeled slice and toss with sugar in a bowl. Once evenly coated add cinnamon, nutmeg and flour and toss again.

  4. Pour peaches into baking dish and place in oven for 10 min while making topping

  5. Begin Topping by mixing together dry ingredients; all-purpose flour, sugar, brown sugar, baking powder and salt. In another bowl whisk together heavy cream and egg gently pour into flour mixture and hand mix together to make a shaggy mixture that will crumble nicely on top of the peaches.

  6. Once the peaches have cooked for 10 min and the topping mixture is ready crumble evenly over the top of the peach mixture.

  7. Cut 8 tbsp of butter into even size cubes. Sprinkle over top of the crumble mixture so they are evenly spread over the pan. Lastly, Evenly sprinkle sugar topping of sugar and cinnamon over the entire pan.

  8. Place back in the oven and cook for 45-50 minutes, until topping is golden and peaches are tender. Top with fresh whipped cream or vanilla ice cream for a great dessert!

Canned Peaches Vs Fresh

When it comes to making a delicious peach cobbler, you have two main choices when deciding which type of peaches to use: fresh or canned. Canned peaches provide a pre-sweetened, convenient base for your cobbler that requires little to no additional preparation. However, fresh peaches provide a more vibrant flavor and texture that will really shine in your cobbler.

When it's not peach season and you may be forced to use canned peaches, don't worry! You can still enjoy this classic recipe year-round with the help of canned peaches. Canned peaches are a great way to make a delicious peach cobbler any time of year. Their soft texture makes them ideal for baking into a cobbler, and they can save you time and energy since they are already peeled and chopped. If you choose to use canned peaches for your cobbler, you have the option of using light or heavy syrup, while fresh peaches should be sweetened to taste. Canned peaches are usually slightly more firm than fresh peaches, so if you want a softer texture you’ll need to simmer the canned peaches a bit before adding them to the cobbler. Plus, you can even add a bit of extra sweetness to your cobbler by using canned peaches in syrup. Just be sure to drain the syrup from the canned peaches before adding them to your cobbler. So don't wait for peach season – you can make a delicious peach cobbler with canned peaches any time of year!

When using fresh peaches for your cobbler, you will need to do some extra preparation in the form of peeling, slicing, and sweetening. Canned peaches are a good option if you’re in a hurry, while fresh peaches require more time and effort to prepare. However, the taste and texture of fresh peaches will be worth the extra effort.

Is It Difficult to Make a Peach Cobbler?

No matter the season, nothing quite captures the flavors of Summer like a delicious homemade peach cobbler. Making a peach cobbler is surprisingly easy and requires only a few ingredients, so you don't need to be a professional chef to make a great-tasting cobbler. All you need is some fresh peaches, butter, sugar, flour, and spices. With just a few steps, you can whip up a delicious homemade peach cobbler in no time.

The combination of sweet peaches, buttery crust, and spices makes for a truly delicious dessert. The sweet and juicy peaches combined with the crunchy and buttery crust, create a flavor combination that is sure to please. The spices add a unique touch that complements the flavor of the peaches and gives the cobbler an extra layer of flavor.

Making a peach cobbler is a great way to enjoy the flavors of Summer all year round. Plus, it's such a simple recipe that even novice bakers can make a delicious cobbler with minimal effort. So, if you're looking for a delicious and easy dessert that captures the flavors of Summer, then why not try making a peach cobbler? With just a few ingredients and a few simple steps, you can have a delicious homemade cobbler ready to enjoy in no time.

Can I Freeze Leftover Peach Cobbler?

Freezing leftover peach cobbler is an easy way to enjoy this delicious dessert later on. To freeze the cobbler, simply place it in an airtight container or wrap it tightly in plastic wrap and aluminum foil. Be sure to label the container with the date it was frozen so you know how long it has been in the freezer. To reheat the cobbler, thaw it in the refrigerator overnight and then bake at 350°F (176°C) until it is heated through. You don’t have to wait until you warm up the cobbler to enjoy it. You can also enjoy it cold straight from the fridge or quickly microwave it to warm up. For extra indulgence, top your frozen cobbler with a scoop of creamy vanilla ice cream. Enjoy your frozen peach cobbler, even months later!

Other Summer Desserts You Will Love:

How to Make the Perfect Arnold Palmer Popsicle: A Delicious Summer Recipe

Indulge in Deliciousness: Cherry Chip Cake with Chunks of Dark Chocolate Recipe

Monster Cookie Recipe

Chocolate Peanut Butter Brownies